Restoring Vintage Hand Planes: A Practical Guide
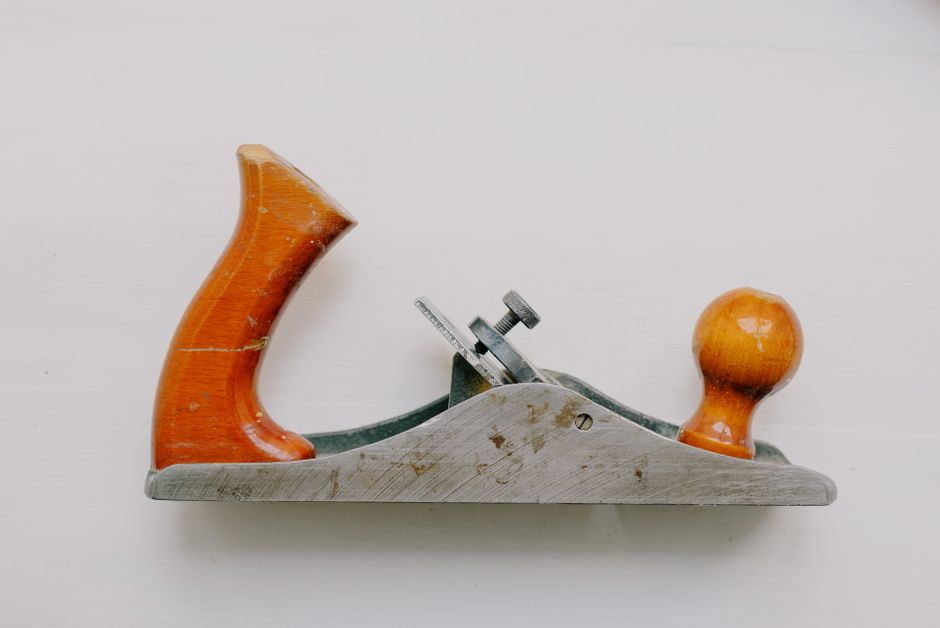
Restoring a vintage hand plane can be a rewarding project that brings new life to a classic tool. Whether you have inherited a family heirloom or found a neglected specimen at a car boot sale, the process involves careful assessment, cleaning, and tuning. This guide outlines a practical approach to restoring antique hand planes, focusing on methods that can make them fully functional for everyday woodworking. The goal is not to create a museum piece but to return the tool to reliable service.
Before beginning any restoration work, it is important to understand the condition of the plane and decide on the level of intervention. Some planes require only light cleaning and sharpening, while others may need more extensive work such as flattening the sole or repairing cracks. The methods described here are based on traditional practices and can be adapted to various types of hand planes, including bench planes, block planes, and specialty planes. Always work in a well-ventilated area and take appropriate safety precautions.
The restoration process can be broken down into several stages: disassembly and assessment, cleaning and rust removal, flattening the sole, sharpening the blade, and final assembly and tuning. Each stage builds on the previous one, and skipping steps may lead to unsatisfactory results. Patience and attention to detail are key, as is the willingness to practice on less valuable tools before tackling a prized antique.
Disassembly and Assessment
The first step in restoring a vintage hand plane is to disassemble it carefully. Most planes can be taken apart by removing the lever cap, blade, chip breaker, and depth adjustment mechanisms. Keep all parts organised, perhaps in a tray or container, to avoid losing small components. Take note of any missing or damaged parts, as replacements may be needed. It is also helpful to photograph the disassembly process to aid reassembly.
Once disassembled, examine each component for signs of wear, cracks, or excessive rust. The sole, the flat bottom of the plane, is critical for performance and should be checked for flatness. The blade, or iron, may have nicks or a rounded edge that requires sharpening. The chip breaker should mate closely with the blade to prevent shavings from jamming. The lever cap and adjustment mechanisms should function smoothly. If the plane has wooden parts, check for splits, warping, or insect damage.
Assessment also involves determining the type and age of the plane. Different manufacturers and eras used different materials and construction methods. For example, early planes may have wooden bodies, while later ones are made of cast iron. Understanding these details can inform the restoration approach. In some cases, it may be advisable to consult reference books or online forums dedicated to antique tools. The Craft Guild often emphasises the importance of preserving original features when possible.
Cleaning and Rust Removal
Cleaning a vintage hand plane involves removing dirt, grease, and rust without damaging the original surfaces. Start by brushing off loose debris with a stiff brush or air compressor. For metal parts, a variety of methods can be used to remove rust, depending on the severity. Light surface rust can often be removed with fine steel wool and a lubricant such as light oil or kerosene. For heavier rust, chemical rust removers or electrolysis may be employed, but these methods require careful handling and safety precautions.
When using chemical rust removers, always follow the manufacturer’s instructions and wear appropriate personal protective equipment. After treatment, neutralise any residual chemicals and dry the parts thoroughly to prevent flash rust. Electrolysis is an effective method for larger parts, but it requires a power supply, a sacrificial anode, and an electrolyte solution. This process can be messy and should be done outdoors or in a well-ventilated area. Alternatively, mechanical methods such as wire brushes or sandblasting can be used, but they may alter the surface texture and should be reserved for heavily rusted areas.
Wooden parts should be cleaned with a mild detergent and water, then allowed to dry slowly. Avoid soaking wood, as it can cause swelling and warping. For wooden planes, a light sanding with fine grit paper can remove surface grime, but be careful not to remove too much material. After cleaning, apply a suitable finish such as linseed oil or wax to protect the wood. Metal parts can be protected with a light coat of oil or paste wax to inhibit future rust.
Flattening the Sole
The sole of a hand plane must be flat for accurate work. Over time, the sole can become worn, dished, or twisted. Flattening the sole involves removing material from high spots until the entire surface is coplanar. This is typically done by lapping the sole on a flat surface such as a granite plate or a thick piece of glass, using abrasive paper or lapping compound. Start with a coarse grit to remove major imperfections, then progress to finer grits to achieve a smooth finish.
Before lapping, check the sole for flatness using a straightedge or feeler gauges. Mark the high spots with a marker pen, then lap until the marks are removed. This process can be time-consuming, especially for heavily worn soles. It is important to maintain the sole’s flatness from front to back and side to side. For wooden planes, flattening may involve planing the sole with another plane, a skill that requires practice.
Some woodworkers prefer to flatten only the critical areas of the sole, such as the toe, heel, and around the mouth. This approach, known as spot flattening, can be sufficient for many tasks and reduces the amount of material removed. However, for precision work, a fully flattened sole is desirable. After flattening, ensure the mouth opening is not excessively large, as this can affect performance. The mouth should be wide enough to allow shavings to pass but narrow enough to support the wood fibres being cut.
Sharpening the Blade
A sharp blade is essential for a hand plane to function effectively. Sharpening involves creating a precise bevel and a keen edge. The process typically starts with grinding the primary bevel on a bench grinder or a coarse waterstone. The angle of the bevel depends on the intended use; common angles are 25 degrees for general work and 30 degrees for harder woods. It is important to maintain a consistent angle throughout the sharpening process.
After grinding, hone the blade on finer stones, such as 1000, 4000, and 8000 grit waterstones. Use a honing guide to maintain the angle, or sharpen freehand if you are experienced. The goal is to remove the scratches from the previous grit and create a polished edge. Finally, remove the burr on the back of the blade by laying it flat on the stone and rubbing it a few times. A micro-bevel can be added at the very edge to strengthen it without affecting the cutting geometry significantly.
Sharpening is a skill that improves with practice. It is advisable to sharpen frequently, as a dull blade requires more effort and can damage the plane. Keep your stones flat by flattening them regularly with a diamond plate or sandpaper on glass. The Craft Guild offers workshops on sharpening techniques for those who wish to learn more. Remember that a sharp blade not only cuts better but also leaves a smoother surface on the wood.
Assembly and Tuning
Once the components are cleaned, flattened, and sharpened, reassemble the plane. Apply a thin coat of oil to the threads of adjustment screws to ensure smooth operation. The chip breaker should be honed to mate perfectly with the blade; any gaps can cause shavings to catch. Set the chip breaker close to the cutting edge, typically within 0.5 to 1 mm, to break chips effectively. The lever cap should hold the blade securely without excessive force.
After assembly, adjust the plane for optimal performance. Set the blade depth so that it takes a thin, even shaving. Test the plane on a piece of scrap wood, adjusting the lateral adjustment lever to ensure the blade is parallel to the sole. The mouth opening should be adjusted if possible; a narrow mouth is better for fine work, while a wider mouth is suitable for rougher work. Make fine adjustments as needed until the plane performs satisfactorily.
Finally, consider the overall condition of the plane. If the handles are loose, tighten them; if they are damaged, repair or replace them. Apply a protective finish to metal parts to prevent rust. Store the plane in a dry place, preferably in a case or on a shelf where it is not exposed to moisture. With proper care, a restored vintage hand plane can provide many years of reliable service in the workshop.