Forging a Knife: From Railroad Spike to Blade
Transforming a discarded railroad spike into a functional knife is a project that sits at the intersection of recycling, craftsmanship, and practical metallurgy. Railroad spikes, typically made from medium-carbon steel, are often found in scrapyards or along abandoned tracks, and they offer a readily available and inexpensive starting material for those interested in blade smithing. The process involves heating the steel to forging temperatures, shaping it through hammering, and then refining the blade through grinding and heat treatment. While the end result may not match the performance of a purpose-made knife steel, the journey provides valuable insights into the behaviour of metal under the hammer.
This article documents the step-by-step transformation of a railroad spike into a knife within a blacksmith’s forge. It covers the essential stages: assessing the material, designing the blade, forging, normalising, grinding, heat treating, and finishing. Each stage requires careful attention to temperature, technique, and safety. The information presented here is intended for educational purposes and assumes access to a properly equipped forge and appropriate personal protective equipment. The Craft Guild emphasises that working with hot metal carries inherent risks, and proper training or supervision is advisable for beginners.
The appeal of this project lies in its accessibility and the satisfaction of turning a piece of scrap into a useful tool. However, it is important to note that the quality of the final knife depends on numerous factors, including the specific alloy of the spike, the consistency of the forging process, and the effectiveness of the heat treatment. Results can vary, and patience is a key attribute throughout the endeavour.
Understanding the Material: Railroad Spike Steel
Railroad spikes are typically made from low to medium-carbon steel, with carbon content often ranging from 0.2% to 0.6%. This range makes them hardenable to some degree, but not to the same extent as high-carbon blade steels. The exact composition can vary depending on the manufacturer and the era of production, which introduces an element of unpredictability. Some spikes may contain trace elements or alloys that affect forgeability and hardening response. Therefore, it is prudent to test a sample piece before committing to a full blade project.
One common method for assessing a spike’s suitability is to perform a spark test on a grinder. The pattern and colour of the sparks can give a rough indication of carbon content. Alternatively, a simple hardening test can be conducted: heat a small section to non-magnetic temperature, quench it in oil or water, and then check with a file. If the file skates, the steel has hardened to some degree. However, even if it hardens, the achievable hardness may be limited. It is also worth noting that spikes often have a distinctive head and a tapered shank, which can influence the design of the knife. Some smiths prefer to leave the head intact to form the pommel or bolster, while others cut it off to create a more conventional blade shape.
When selecting a spike, look for one that is relatively free of excessive rust or deep pitting. Surface rust can be removed during forging, but heavy corrosion may indicate structural issues. Additionally, spikes that have been used in track may have been subjected to stress and may contain micro-cracks. Visual inspection and a gentle tap with a hammer can help identify obvious flaws. If in doubt, discard the spike and find another. The Craft Guild recommends sourcing spikes from reputable suppliers or known sources to reduce variability.
Designing the Knife and Preparing the Forge
Before striking any metal, it is essential to have a clear design in mind. The size and shape of the railroad spike will dictate the possible dimensions of the knife. A typical spike is around 15–20 cm long, with a head about 2–3 cm in diameter. This limits the maximum blade length to perhaps 10–12 cm if the head is used as a pommel, or slightly longer if the head is drawn out. Common designs include a simple spear-point or drop-point blade with a hidden tang or a through-tang construction. The choice depends on the intended use and the smith’s skill level.
Sketching the profile on paper or directly on the spike with a soapstone marker can help guide the forging process. Consider the placement of the ricasso, the plunge line, and the handle. If the spike head is to become a pommel, plan how the tang will transition into it. Alternatively, the head can be flattened and shaped into a guard or bolster. The design should also account for the fact that the steel moves slowly under the hammer, especially at lower temperatures. It is better to start with a simple shape and refine it as you go.
Preparing the forge involves ensuring a stable heat source and a clear workspace. A gas forge is convenient for controlled heating, while a coal or charcoal forge offers a more traditional experience but requires more attention to airflow and clinker management. The forge should be brought up to temperature before introducing the spike. The ideal forging temperature for medium-carbon steel is between 800°C and 1000°C, appearing as a bright orange to yellow colour in dim light. Overheating can cause grain growth and burning, so it is important not to exceed the recommended range.
Safety equipment is non-negotiable. This includes safety glasses, hearing protection, heat-resistant gloves, and a leather apron. Ensure that the anvil is secure and that the hammer is in good condition. A bucket of water or oil for quenching should be nearby, along with tongs suitable for holding the spike. The Craft Guild advises that beginners seek instruction from experienced smiths before attempting this project alone.
The Forging Process: Shaping the Blade
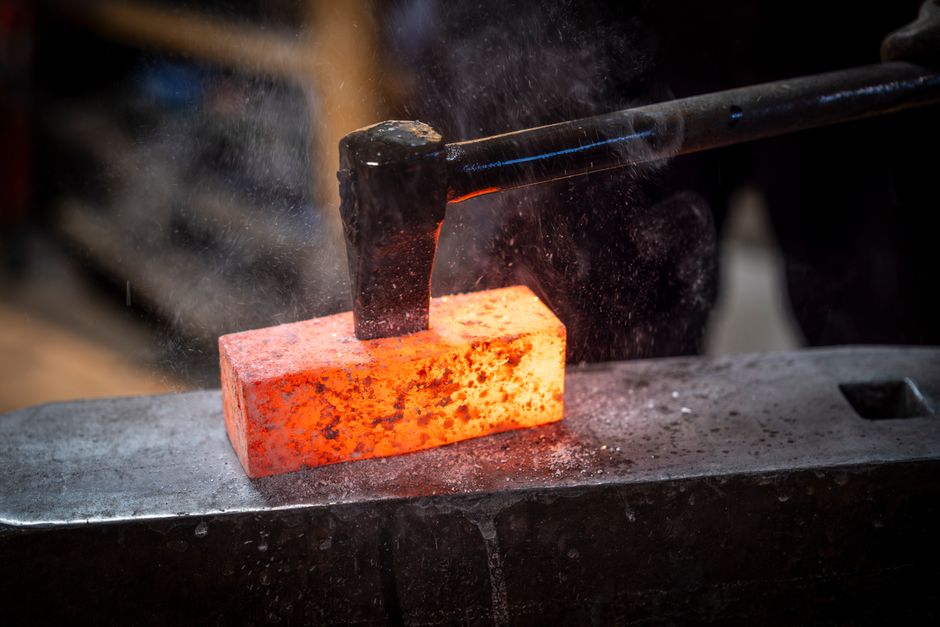
With the forge at temperature, the spike is introduced and heated until it reaches a uniform orange-yellow colour. It is then transferred to the anvil, where the initial shaping begins. The first step is often to draw out the shank to form the blade. This is done by striking the steel with a hammer, using the anvil’s face and edge to direct the metal. The goal is to elongate the shank while reducing its thickness, creating a blade profile. This stage requires steady, controlled blows, rotating the workpiece frequently to maintain symmetry.
As the steel cools and loses its colour, it must be returned to the forge for reheating. Working within the correct temperature range is crucial: too cold, and the steel may crack; too hot, and it may burn or become too soft to move effectively. The process of heating, hammering, and reheating is repeated multiple times until the desired blade shape emerges. It is common to use a cross-peen hammer for drawing out and a flat hammer for smoothing. The spike head can be left as is or forged into a pommel shape by upsetting or flattening.
Once the basic profile is established, the blade is refined. This involves setting the bevels, which are the angled surfaces that lead to the cutting edge. Bevels can be forged in using a hammer with a rounded face or a specialty tool, but many smiths prefer to forge the blade close to shape and then use grinding to establish the final bevels. During forging, it is important to avoid creating deep hammer marks that will be difficult to remove later. If the steel begins to crack or split, it may be due to overheating or impurities; in such cases, the damaged section may need to be cut off and the process restarted.
After the blade is shaped, the tang is formed. If the spike head is used as a pommel, the tang is simply the continuation of the shank into the head. If a through-tang is desired, the shank is drawn out further and then shaped to fit the handle material. The tang should be robust enough to withstand the forces of use, but not so thick that it makes the knife unbalanced. At this point, the blade may be annealed to relieve stresses and make it easier to grind. Annealing involves heating the steel to non-magnetic temperature and then cooling it slowly, often in ashes or vermiculite.
Grinding, Heat Treatment, and Finishing
After forging and annealing, the blade is ready for grinding. This stage removes scale, refines the shape, and establishes the cutting edge geometry. A belt grinder is the tool of choice for most modern smiths, but files and stones can be used for a more traditional approach. The grinding process starts with a coarse belt to remove forge marks and establish the bevels, then progresses to finer belts to refine the surface. Care must be taken not to overheat the blade during grinding, as this can affect the heat treatment. Dipping the blade in water frequently is a common practice.
Heat treatment is the critical step that determines the blade’s hardness and toughness. For railroad spike steel, the process begins with normalising: heating the blade to non-magnetic temperature and allowing it to cool in still air. This is repeated two or three times to refine the grain structure. Then, the blade is heated again to non-magnetic and quenched in a suitable medium. Oil is generally preferred for medium-carbon steels to reduce the risk of cracking, but some smiths use water or brine for faster cooling. The quench should be done quickly and decisively, immersing the blade edge-first or point-first depending on the design. After quenching, the blade is tempered by heating it to a lower temperature (typically 150–200°C) and holding it for a period. This reduces brittleness while retaining hardness. The exact tempering temperature can be adjusted to achieve the desired balance of properties.
Once heat treated, the blade is cleaned and sharpened. This involves removing any scale from the quench and refining the edge with stones or abrasive papers. The handle is then attached. If the spike head serves as the pommel, the handle material is fitted between the blade and the head. Common handle materials include hardwood, antler, or synthetic composites. The handle is shaped and sanded to fit comfortably in the hand, then finished with oil or varnish. Finally, the blade is honed to a sharp edge and the knife is complete. The entire process, from start to finish, can take several hours to a full day, depending on the smith’s experience and the complexity of the design.
It is important to recognise that a knife made from a railroad spike may not hold an edge as well as one made from high-carbon blade steel. However, it can still be a functional tool for light tasks, and the experience gained is invaluable. The Craft Guild encourages smiths to document their processes and share knowledge, as this contributes to the collective understanding of the craft.